- Physical Examination
- Surgical Examination
- Ophthalmology
- Clinical Skills
- Orthopedics
- Surgery Videos
- Laparoscopy
- Pediatrics
- Funny Videos
- Cardiothoracic Surgery
- Nursing Videos
- Plastic Surgery
- Otorhinolaryngology
- Histology and Histopathology
- Neurosurgery
- Dermatology
- Pediatric Surgery
- Urology
- Dentistry
- Oncology and Cancers
- Anatomy Videos
- Health and Fitness
- Radiology
- Anaesthesia
- Physical Therapy
- Pharmacology
- Interventional Radiology
- Cardiology
- Endocrinology
- Gynecology
- Emergency Medicine
- Psychiatry and Psychology
- Childbirth Videos
- General Medical Videos
- Nephrology
- Physiology
- Diet and Food Health
- Diabetes Mellitus
- Neurology
- Women Health
- Osteoporosis
- Gastroenterology
- Pulmonology
- Hematology
- Rheumatology
- Toxicology
- Nuclear Medicine
- Infectious Diseases
- Vascular Disease
- Reproductive Health
- Burns and Wound Healing
- Other
Top videos
Watch that Female Recto-vaginal Exam Video
Fremale to male gender reassignment surgery
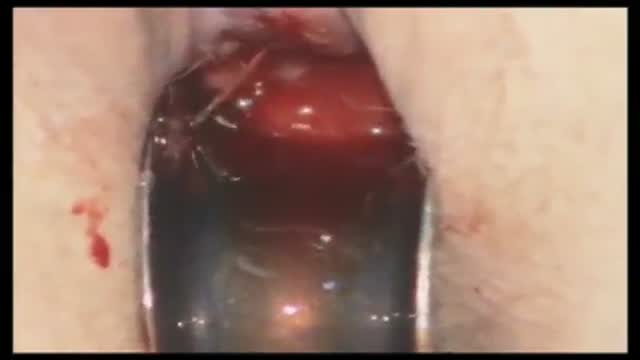
A craniotomy involves making an incision in the scalp and creating a hole known as a bone flap in the skull. The hole and incision are made near the area of the brain being treated. During open brain surgery, your surgeon may opt to: remove tumors. clip off an aneurysm
https://www.youtube.com/watch?v=Uc6ZotU5mxA
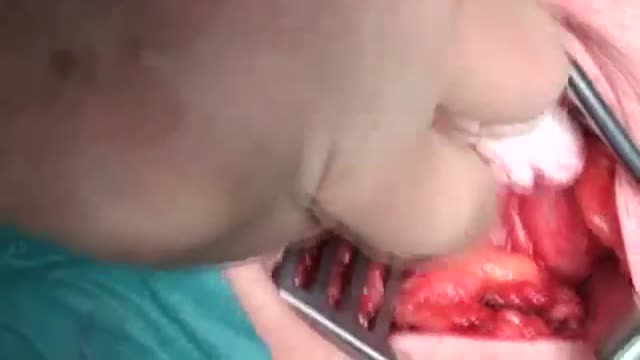
During surgery to repair the hernia, the bulging tissue is pushed back in. Your abdominal wall is strengthened and supported with sutures (stitches), and sometimes mesh. This repair can be done with open or laparoscopic surgery. You and your surgeon can discuss which type of surgery is right for you.

Retro-sigmoid craniotomy (often called "keyhole" craniotomy) is a minimally-invasive surgical procedure performed to remove brain tumors. This procedure allows for the removal of skull base tumors through a small incision behind the ear, providing access to the cerebellum and brainstem. Neurosurgeons may use this approach to reach certain tumors, such as meningiomas and acoustic neuromas (vestibular schwannomas).
This video demonstrates the management of a large abscess in the emergency department. This abscess probably began as a sebaceous cyst that became infected.

http://sin-celulitis.good-info.co/ Como Quitar La Celulitis, Celulitis En La Pierna, Drenaje Linfatico Celulitis, Reducir Celulitis. Imagina Que En Tan Solo 8 Semenas Pudieras... Usar la ropa que quisieras sin preocuparte. Mirarte al espejo con total satisfacción. Usar ese traje de baño que tanto te gusta. Tener relaciones con tu pareja y volverlo loco con tu piel suave y lisa. Sentirte llena de confianza y optimismo. Olvidarte de la celulitis para siempre. ¿Has deseado alguna vez lucir una piel bella y sin los desagradables hoyuelos causados por la celulitis? Haz Clic Aqui. http://sin-celulitis.good-info.co
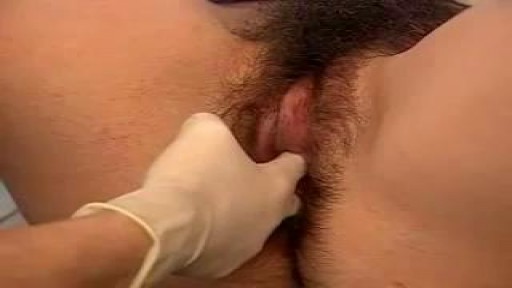
ectal exam is an internal examination of the rectum such as by a physician or other healthcare professional.
The digital rectal examination (DRE, Latin palpatio per anum or PPA) is a relatively simple procedure. The patient is placed in a position where the anus is accessible and relaxed (lying on the side, squatting on the examination table, bent over the examination table, etc). The physician inserts a gloved and lubricated finger into the rectum through the anus and palpates the insides.
The DRE is inadequate as a screening tool for colorectal cancer because it examines less than 10% of the colorectal mucosa; colonoscopy is preferred. However, it's an important part of a general examination, as many tumors or other diseases are made manifest in the distal part of the rectum.
This examination may be used: * for the diagnosis of rectal tumors and other forms of cancer; * in males, for the diagnosis of prostatic disorders, notably tumors and benign prostatic hyperplasia; * for the diagnosis of appendicitis or other examples of an acute abdomen (i.e. acute abdominal symptoms indicating a serious underlying disease); * for the estimation of the tonicity of the anal sphincter, which may be useful in case of fecal incontinence or neurologic diseases, including traumatic spinal cord injuries; * in females, for gynecological palpations of internal organs * for examination of the hardness and color of the feces (ie. in cases of constipation, and fecal impaction); * prior to a colonoscopy or proctoscopy. * to evaluate haemorrhoids
The DRE is frequently combined with an FOBT (fecal occult blood test), which may be useful for diagnosing the etiology of an anemia and/or confirming a gastrointestinal bleed.
Sometimes proctoscopy may also be part of a rectal examination.
Orgasmic childbirth is a new variant of water birth delivery.
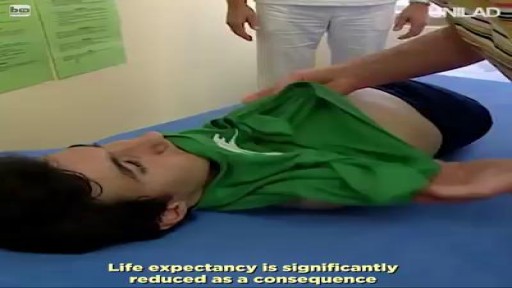
Meet Christian, an incredible man born with no arms or legs who lives life to the fullest
Normal Vaginal Delivery
Surgical abortion using the dilatation and curretage technique.
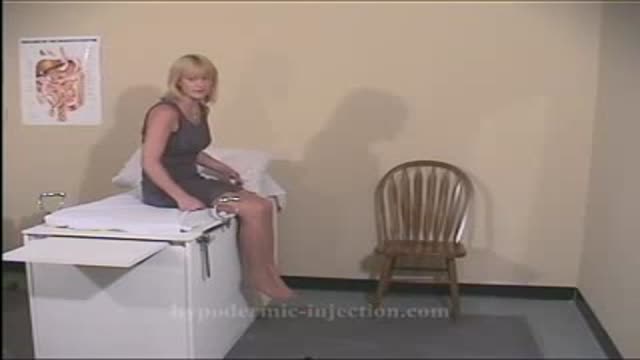
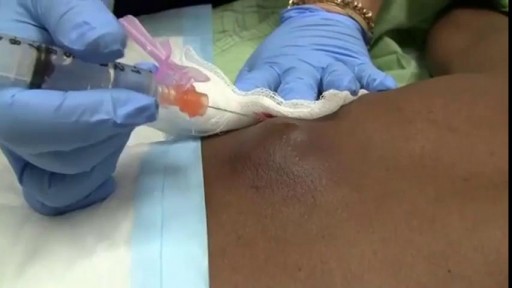
http://www.hypodermic-injection.com This is a demonstration of an IM hypodermic injection administered in the gluteus maximus muscle. The patient is in the prone position.
http://www.proctoscopeexam.com This is a demonstration of a proctoscope examination of the rectum.
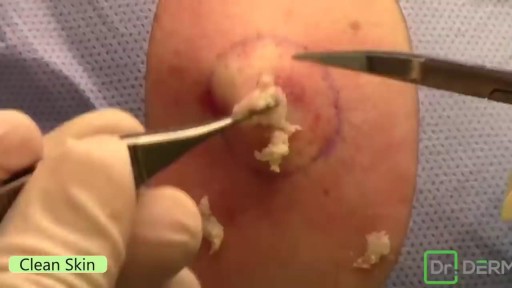
Popping Huge Cyst in the Back
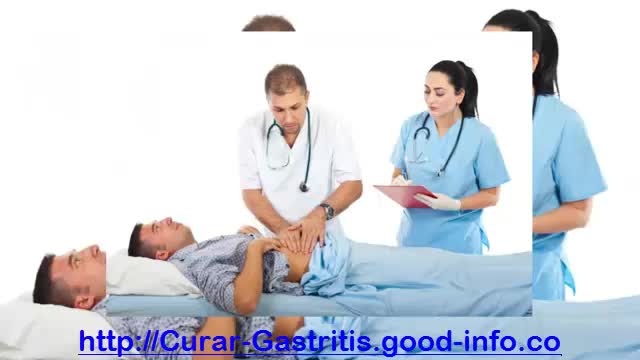
Remedios Caseros Para La Gastritis, Remedio Para La Gastritis, Jugos Para La Gastritis
http://curar-gastritis.good-info.co
La cura natural comienza desde el interior revirtiendo las causas que la originan.
“La gastritis” se da por problemas digestivos y la deficiente función del sistema inmunológico, resultado de una incorrecta alimentación y de malos hábitos.
Se debe curar la raíz, “La Raíz Son Los Hábitos En El Estilo De Vida”, de lo contrario nada efectivo sucederá por más antiácidos, antibióticos o simples remedios caseros que tomemos. E incluso ni una cirugía la soluciona. Al contrario todo esto complica el problema.
La cura natural y definitiva se logra aplicando un conjunto de técnicas como las siguientes:
. Incorporando una correcta nutrición con alimento físico y otros elementos importantes de la naturaleza.
. Incorporando hábitos saludables.
. Infusión de hierbas.
. El consumo de minerales naturales.
. Evitando el consumo alimentos tóxicos y dañinos.
. Eliminando el consumo de medicamentos.
La verdad De Cómo Eliminar La Gastritis De Raíz
Con El Método 100% Natural Y El Mas Efectivo Que Existe
Haciendo Click Aqui: http://curar-gastritis.good-info.co
Haga Clic En El Enlace De Abajo Para Comprobar Que Funciona
http://curar-gastritis.good-info.co
Suscríbete A Nuestro Canal
https://www.youtube.com/user/VivirConSalud1
https://www.youtube.com/watch?v=g61B6C6m2Cg
Remedios Caseros Para La Gastritis, Remedio Para La Gastritis, Jugos Para La Gastritis,
consecuencias de la gastritis,
dieta para personas con gastritis,
que es la gastritis cronica,
sintomas de gastritis aguda,
tratamiento natural para la gastritis,
sintomas de la gastritis cronica,
remedio casero para gastritis,
alimentos para gastritis,
sintomas del helicobacter pylori,
gastritis cie 10,
helicobacter pylori síntomas,
remedio para gastritis
Proctoscope rectal examination
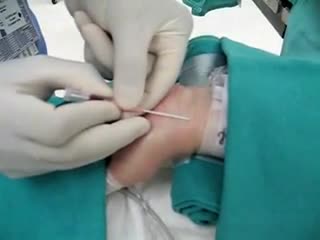
Arterial line insertion usually involves cannulation of the radial artery with a 20 gauge catheter for the purposes of beat-by-beat blood pressure monitoring all along with arterial blood gas monitoring.

http://eliminar-seu-diabetes.good-info.co/ Tipos De Diabetes, Diabets, Alimentação Para Diabéticos, Diabetes Tipo Ii, Yacon Diabetes, https://youtu.be/iDK8jKuR_VQ É provável que se sinta identificado com alguma destas situações. Tem medo de uma complicação a longo prazo, como a perda da visão, a amputação dos dedos dos pés, de extremidades ou inclusive da morte? Quer terminar com as injeções diárias de insulina e as picadas nos dedos? Enfrenta diariamente o fato de que tem 80% de probabilidades de morrer com doenças cardíacas ou derrame cerebral? Sofre de excesso de peso que não pode eliminar, causada por seus medicamentos? Quer deixar de se sentir culpado por ter dietas especiais que complicam a organização da sua família? Está oprimido pelo cuidado e controle que diariamente esta doença precisa? Quer deixar de sofrer os terríveis efeitos secundários que provocam os medicamentos para o Diabetes? Sei o que se sente. pensar que não existe esperança, que não tem cura e que estamos condenados a viver doentes. Mas hoje Tenho Excelentes Notícias para lhe dar e posso garantir que o que você vai ler neste site será o mais importante que tenha lido em toda a sua vida.
