- Physical Examination
- Surgical Examination
- Ophthalmology
- Clinical Skills
- Orthopedics
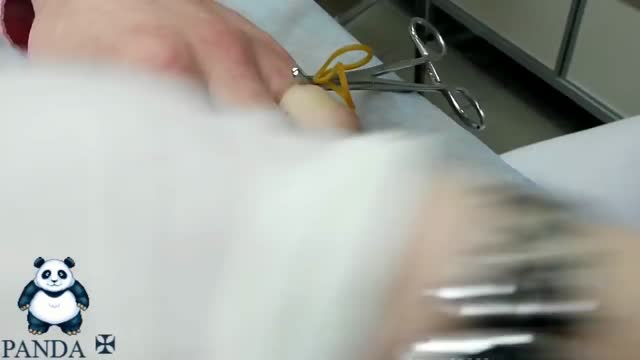
- Surgery Videos
- Laparoscopy
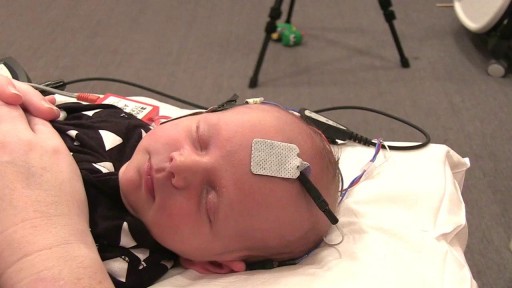
- Pediatrics
- Funny Videos
- Cardiothoracic Surgery
- Nursing Videos
- Plastic Surgery
- Otorhinolaryngology
- Histology and Histopathology
- Neurosurgery
- Dermatology
- Pediatric Surgery
- Urology
- Dentistry
- Oncology and Cancers
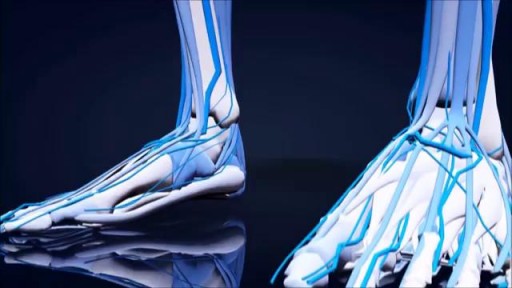
- Anatomy Videos
- Health and Fitness
- Radiology
- Anaesthesia
- Physical Therapy
- Pharmacology
- Interventional Radiology
- Cardiology
- Endocrinology
- Gynecology
- Emergency Medicine
- Psychiatry and Psychology
- Childbirth Videos
- General Medical Videos
- Nephrology
- Physiology
- Diet and Food Health
- Diabetes Mellitus
- Neurology
- Women Health
- Osteoporosis
- Gastroenterology
- Pulmonology
- Hematology
- Rheumatology
- Toxicology
- Nuclear Medicine
- Infectious Diseases
- Vascular Disease
- Reproductive Health
- Burns and Wound Healing
- Other
Top videos
Use warm water and sea salt. Soak the wart for 10 to 15 minutes in warm salt water to moisten the skin. Scrape the dead skin layers off the wart using a nail file, pumice stone or mild sandpaper. You could also use your fingers, but wash them thoroughly before and after, as warts can easily spread.

Iron is a mineral that plays a vital role in health and well-being. Without it, many bodily functions would malfunction. “The primary role of iron is to carry oxygen in the blood to every cell in the body,” says Beth Thayer, RDN, MS, director of the Center for Health Promotion and Disease Prevention at Henry Ford Health System in Detroit. Iron is an important component of hemoglobin, the protein in red blood cells that carries oxygen from the lungs and transports it throughout the body.
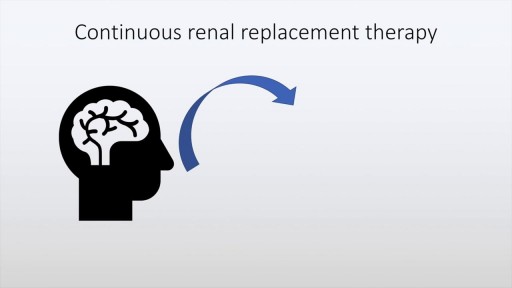
Renal replacement therapies are a set of interventions and techniques aimed at replacement of the filtering function of the kidneys. These include both dialysis and renal transplant. In this presentation we will talk about the indication and modalities of dialysis. This includes hemodialysis, peritoneal dialysis and continuous renal replacement therapies. The circuit diagram of each modalities along with its procedure and complications are also discussed.
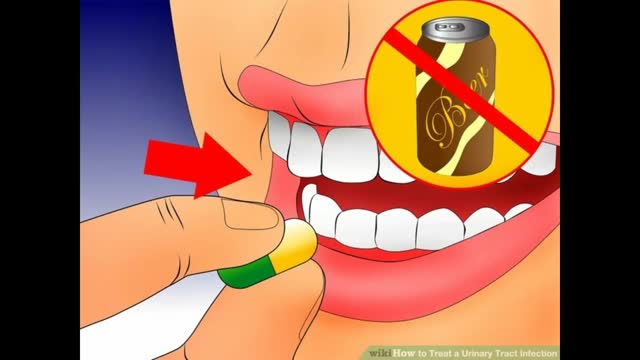
Urinary tract infections (UTIs) are infections of the urethra, bladder, ureters, or the kidneys, which comprise the urinary tract. E. coli bacteria cause the majority of UTIs, but many other bacteria, fungi, and parasites may also cause UTIs. Females have a higher risk for UTIs than most males, probably because of their anatomy; other risk factors for UTIs include any condition that may impede urine flow (e.g., enlarged prostate, kidney stones, congenital urinary tract abnormalities, and inflammation). Patients with catheters or those who undergo urinary surgery and men with enlarged prostates are at higher risk for UTIs.
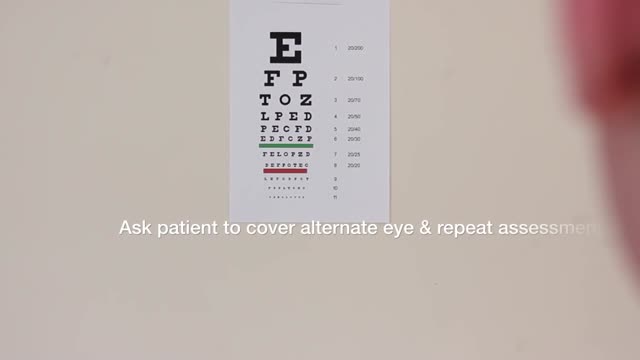
Examination of the Eyes and Vision
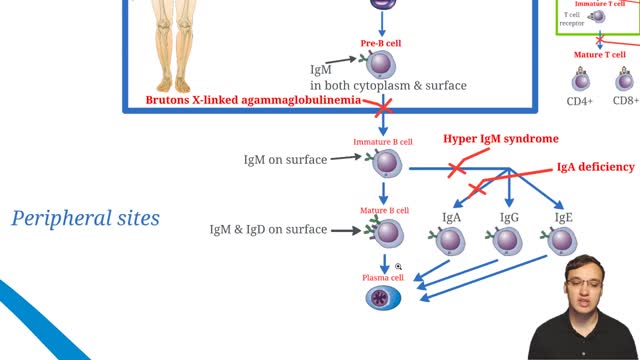
X-linked agammaglobulinemia (XLA), or Bruton agammaglobulinemia, is an inherited immunodeficiency disease caused by mutations in the gene coding for Bruton tyrosine kinase (BTK). The disease was first elucidated by Bruton in 1952, for whom the gene is named. BTK is critical to the maturation of pre–B cells to differentiating mature B cells. The BTK gene defect has been mapped to the long arm of the X chromosome at band Xq21.3 to Xq22, spanning 37.5kb with 19 exons forming 659 amino acids to complete the BTK cytosolic tyrosine kinase. A database of BTK mutations (BTKbase: Mutation registry for X-linked agammaglobulinemia) lists 544 mutation entries from 471 unrelated families showing 341 unique molecular events. No single mutation accounts for more than 3% of mutations in patients. In addition to mutations, a number of variants or polymorphisms have been found.
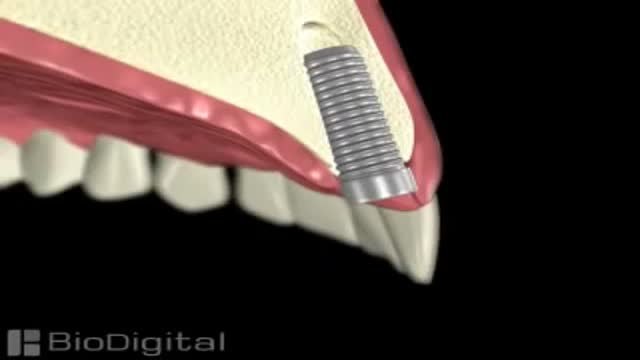
If you are self-conscious because you have missing teeth, wear dentures that are uncomfortable or don't want to have good tooth structure removed to make a bridge, talk to your dentist to see if dental implants are an option for you. Dental implants are a popular and effective way to replace missing teeth and are designed to blend in with your other teeth. They are an excellent long-term option for restoring your smile. In fact, the development and use of implants is one of the biggest advances in dentistry in the past 40 years. Dental implants are made up of titanium and other materials that are compatible with the human body. They are posts that are surgically placed in the upper or lower jaw, where they function as a sturdy anchor for replacement teeth.
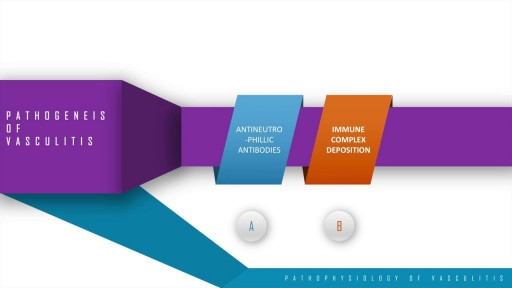
A step wise approach to the pathogenesis, types, disease entities and diagnosis of vasculitis. This discussion also includes the management options of vasculitis and their adverse drug reactions. In essence, vasculitis is a clfinicopathologic process characterised by inflammation and damage of blood vessels. This may be mainly due to three pathological processes which include immune complex deposition, anti-neutrophillic antibody formation and pathological T lymphocyte response and granuloma formation. The disease entities include Wegner's granulomatosis, Churg Strauss and many others. These present with palpable purpura, unexplained renal dysfunction etc which can be diagnosed based on biopsy and angiogram.
Nasal polyps are soft, painless, noncancerous growths on the lining of your nasal passages or sinuses. They hang down like teardrops or grapes. They result from chronic inflammation due to asthma, recurring infection, allergies, drug sensitivity or certain immune disorders. Nasal polyps are polypoidal masses arising mainly from the mucous membranes of the nose and paranasal sinuses. They are overgrowths of the mucosa that frequently accompany allergic rhinitis, and are freely movable and nontender.

Thoracic Epidural Placement Paramedian Approach

Removing acne scars with laser
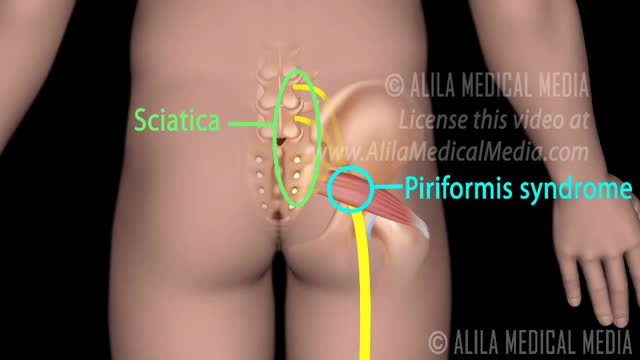
Piriformis syndrome refers to when the piriformis muscle irritates the sciatic nerve and caues pain along the back of the leg and foot.
💪 Get our Knee Resilience program here: https://e3rehab.com/programs/r....esilience/knee-resil
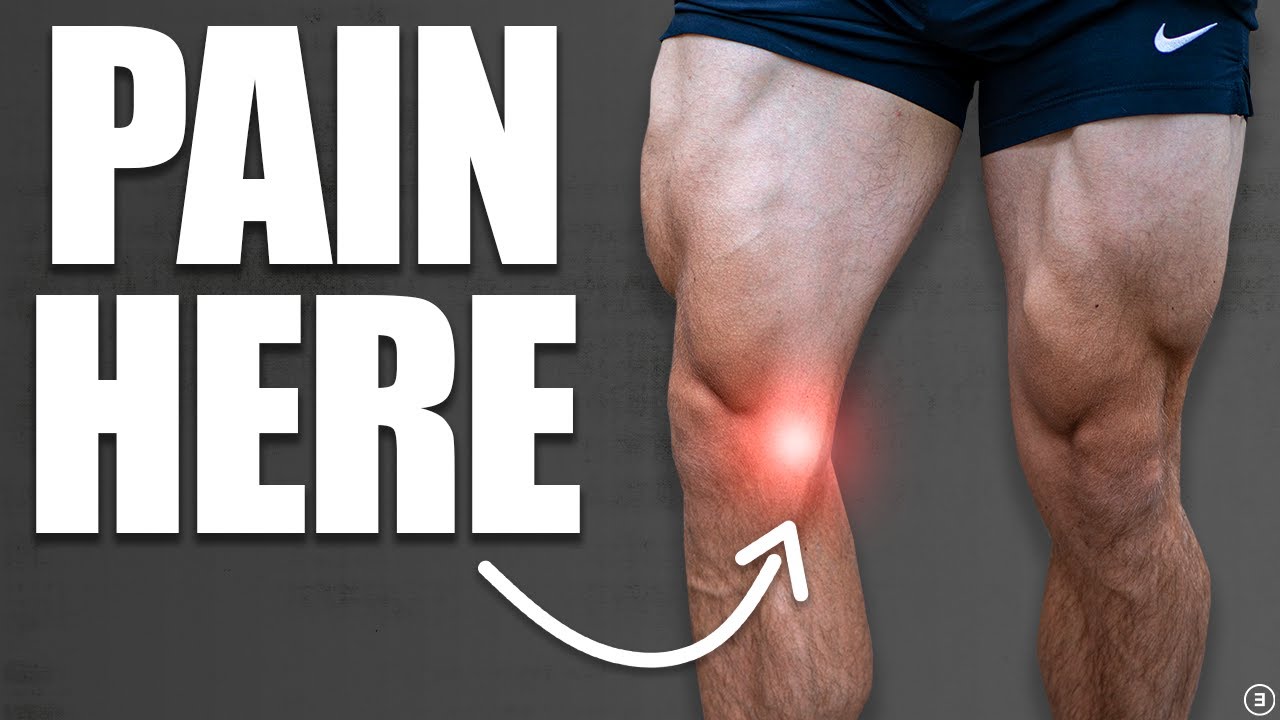
In this video, I will walk you through a comprehensive rehab program for the most commonly injured knee ligament - the MCL.
💪 PROGRAMS: https://e3rehab.com/programs/
📩 MAILING LIST (exclusive deals, offers, and information): https://e3rehab.com/newsletter/
🏆 COACHING: https://e3rehab.com/coaching/
📝 ARTICLES: https://e3rehab.com/articles/
👕 APPAREL: https://e3rehab.com/clothing/
🎧 PODCAST: https://open.spotify.com/show/....5ZbaI145Bk94Guq7olMJ
AFFILIATES:
👟 Vivo Barefoot: Get 15% off all shoes! - https://www.vivobarefoot.com/e3rehab
📓 MASS (Monthly Research Review): http://bit.ly/E3MASS
📚 CSMi: https://humacnorm.com/e3rehab
🏋️ GYM EQUIPMENT: https://e3rehab.com/affiliates/
Follow Us:
YOUTUBE: https://www.youtube.com/@e3reh....ab?sub_confirmation=
INSTAGRAM: https://www.instagram.com/e3rehab
TWITTER: https://twitter.com/E3Rehab
FACEBOOK: https://www.facebook.com/e3rehab
TIKTOK: https://www.tiktok.com/@e3rehab
Intro (0:00)
Anatomy & Function (0:08)
Classification (1:11)
Treatment Options (1:46)
Bracing (3:30)
Rehab Overview (4:28)
Early Stage (5:27)
Mid-Stage(8:50)
Late Stage/Return to Sport (21:14)
Programming (22:13)
Summary (23:47)
---
Disclaimer: The information presented is not intended as medical advice or to be a substitute for medical counseling but intended for entertainment purposes only. If you are experiencing pain, please seek the appropriate healthcare professional.

What is hemodialysis, and why would someone need it? How does hemodialysis work? Can people perform hemodialysis at home? John Kevin Tucker, M.D., Nephrologist at Brigham and Women's Hospital and Vice President for Education at Mass General Brigham, discusses hemodialysis and how it helps people who have lost their kidney function to maintain normal lives.
Subscribe Link: https://www.youtube.com/channe....l/UCYrLjATd88gPwIKnt
0:00 - Intro
0:26 - The Condition
2:06 - Hemodialysis: How It Works
4:37 - In-Center Hemodialysis Care Team
About Mass General Brigham:
Mass General Brigham combines the strength of two world-class academic medical centers, five nationally ranked specialty hospitals, 11 community hospitals, and dozens of health centers. Our doctors and researchers accelerate medical breakthroughs and drive innovations in patient care. They are leaders in medical education, serving as Harvard Medical School faculty and training the next generation of physicians. Mass General Brigham’s mission is to deliver the best, affordable health care to patients everywhere. Together, we transform the health of our communities and beyond.
#MassGeneralBrigham #MGB #Hemodialysis
Visit Mass General Brigham: https://www.massgeneralbrigham.org/
Find us on social:
Twitter: https://twitter.com/MassGenBrigham
Instagram: https://www.instagram.com/massgeneralbrigham/
Facebook: https://www.facebook.com/MassGeneralBrigham/
LinkedIn: https://www.linkedin.com/compa....ny/mass-general-brig
Mass General Brigham:
https://www.youtube.com/massgeneralbrigham
Kidney Failure: Signs, Dialysis Options, and Hemodialysis Explained | Mass General Brigham
https://youtu.be/azy7yc19QYQ
Tongue Lipoma Removal

Tears Of Abortion - Story of an aborted baby,
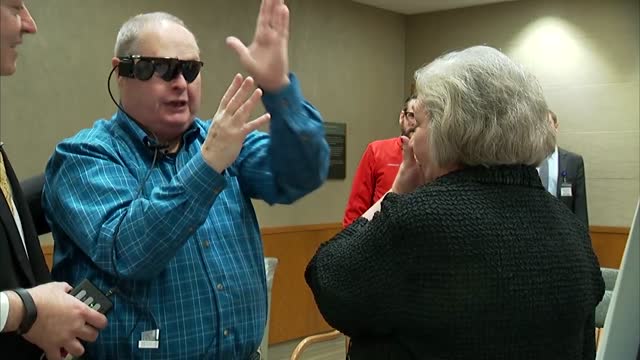
A visual prosthesis, often referred to as a bionic eye, is an experimental visual device intended to restore functional vision in those suffering from partial or total blindness. In 1983 Joao Lobo Antunes, a Portuguese doctor, implanted a bionic eye in a person born blind.

