- Physical Examination
- Surgical Examination
- Ophthalmology
- Clinical Skills
- Orthopedics
- Surgery Videos
- Laparoscopy
- Pediatrics
- Funny Videos
- Cardiothoracic Surgery
- Nursing Videos
- Plastic Surgery
- Otorhinolaryngology
- Histology and Histopathology
- Neurosurgery
- Dermatology
- Pediatric Surgery
- Urology
- Dentistry
- Oncology and Cancers
- Anatomy Videos
- Health and Fitness
- Radiology
- Anaesthesia
- Physical Therapy
- Pharmacology
- Interventional Radiology
- Cardiology
- Endocrinology
- Gynecology
- Emergency Medicine
- Psychiatry and Psychology
- Childbirth Videos
- General Medical Videos
- Nephrology
- Physiology
- Diet and Food Health
- Diabetes Mellitus
- Neurology
- Women Health
- Osteoporosis
- Gastroenterology
- Pulmonology
- Hematology
- Rheumatology
- Toxicology
- Nuclear Medicine
- Infectious Diseases
- Vascular Disease
- Reproductive Health
- Burns and Wound Healing
- Other
Top videos
Is Shingles Contagious, What Are Shingles, Herpes Zoster Pictures, Shingles Home Remedies --- http://shingles-cure.good-info.co/ --- If You Are A Newcomer To This Disease, I Hate To Be The Bringer Of Bad News But You Should Know That The List Of Potential Symptoms Is Depressingly Long. These Include The Following: A General Feeling Of Muscle Pain To Begin With, Almost Like Flu A Tingling, Burning Type Sensation In A Specific Area Of The Skin Fever And Headache And Sometimes A Swelling Of The Lymph Nodes A Band Of Spots And Then A Rash At A Specific Part Of Your Body – Very Often The Head Or The Side Of The Trunk Infection Over The Site Of The Rash – Leaving It Prone To Additional Tissue Damage From Bacteria Postherpetic neuralgia leading to chronic nerve pain Ulceration Of The Eye – In Those Cases Where The Shingles Rash Occurs In The Area Of The Eye – Known As Zoster Ophthalmicus. Stress And Depression – Particularly Where The Illness Lingers On For A Long Period Everyone Is Different And Not Everyone Will Experience All Of Those Symptoms. However Even The Most Mild Case Of Shingles Can Be Extremely Debilitating – Something Of Which I Am All Too Aware. Tired Of Fighting A Never Ending Battle Against Shingles? Sick Of Being Told That There´s Nothing You Can Do To Speed Up Recovery? Wherever You Are In Your Fight Against Shingles, I Can Help In this presentation, shows you some unique and rare methods to get rid of shingles naturally in as little as 14 days! This is based on proven techniques used by shingles sufferers without the use of pills and other medication. Get Rid of Shingles will also boost your energy and health dramatically and improve the quality of your life. IMPORTANT NOTE: I can't leave this video up for long, so be sure to watch it from beginning to end while it's still here. REMEMBER: Watch the whole video, as the ending will pleasantly surprise you. click here: http://shingles-cure.good-info.co/
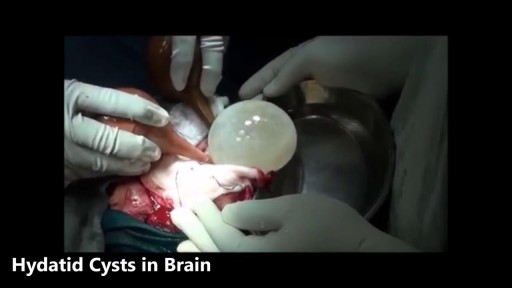
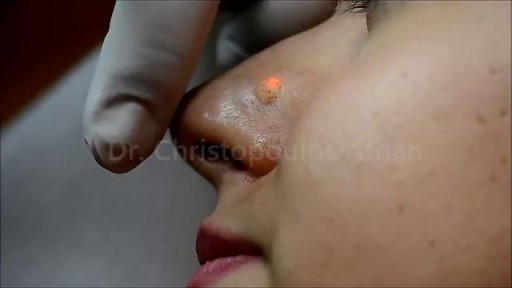
Watch that video of the Worst Brain & Liver Cysts Removal\

Vitiligine Cause, Vitiligine Bambini, Micropigmentazione Vitiligine, Vitiligine Trucco, Vitiligine --- http://vitiligine-cura.good-info.co --- Un Ricercatore Medico, Nutrizionista, Consulente Di Salute Ed Ex Malato Cronico Di Vitiligine Ti Spiega Come: Curare La Vitiligine E Ripristinare Il Colore Naturale Della Tua Pelle In 7 Giorni! Curare La Causa Alla Base Della Vitiligine Affrontando Le Cause Interne Di Questo Disturbo In 45 - 60 Giorni. Prevenire La Comparsa Di Cicatrici E Segni Gettare Via . Lozioni O Creme "Miracolo" E Sentirti Subito Più Fiducioso! Risparmiare Migliaia Di Euro In Farmaci, Laser E Trattamenti UV, Visite Dal Dottore O Operazioni Chirurgiche! Ripristinare Il Tuo Equilibrio Interno E Fermare I Problemi Di Salute Legati Alla Vitiligine Mantenendoli Alla Larga Per Sempre! Perdere Chili In Eccesso, Sembrare Più Giovane E Riguadagnare L'autostima Ripristinare I Livelli Di Energia E Migliorare La Qualità Della Vita Significativamente... Garantito! Se Vuoi Imparare Come Curare La Vitiligine In Modo Definitivo E Riaquistare La Tua Salute E Benessere, Senza Farmaci, Senza I Tradizionali Trattamenti Per La Vitiligine E Senza Alcun Effetto Collaterale, Allora Questa Sarà La Lettura Più Importante Che Abbia Mai Fatto. Te Lo Garantisco E Ho I Risultati Per Provartelo! http://vitiligine-cura.good-info.co

Como Aumentar La Libido, Aumentar Niveles De Testosterona, Como Aumentar El Deseo Masculino ---- http://aumentar-testosterona.good-info.co/ --- ¿Se puede tener una erección con bajos niveles de testosterona? Mi libido está quedando atrás y estoy teniendo dificultades para conseguir una erección, así que estoy tratando de averiguar qué está pasando aquí. La disfunción eréctil rara vez es causada sólo por la deficiencia de testosterona. Por lo general es un grupo de cosas que funcionan en concierto juntos, que se alimentan entre sí, que conducen a la incapacidad del hombre para lograr una erección. La aterosclerosis (estrechamiento y endurecimiento de las arterias) es uno de los mayores impulsores de la disfunción eréctil, pero estas arterias dañadas no aparecen de la nada. Otras cosas tienen que estar sucediendo en el cuerpo para que ésta aterosclerosis pase, y como estamos a punto de ver, estas otras cosas contribuyen al problema también. Así que vamos a repasar esta lista… Nivel de azúcar alto – baja testosterona y disfunción eréctil La azúcar elevada en la sangre es un arma de doble filo, porque los hombres que sufren de esta condición son mucho más propensos a ser afectados por la disfunción eréctil y la testosterona baja. Una Investigación de John Hopkins encontró que las ratas diabéticas presentaron una respuesta eréctil 30% inferior, sus erecciones fueron como máximo 40% más pequeñas y las erecciones tomaron 70% más tiempo para lograrse en comparación con los controles que no eran diabéticos. Otros estudios han confirmado que los hombres con diabetes tipo 2 son dos veces más propensos a sufrir de disfunción eréctil, y la condición les golpeará una década antes, en comparación con los hombres sin tipo 2. Este vínculo es tan fuerte porque el azúcar en la sangre hace un daño directo a las arterias cuando se tiene demasiado de él, y las arterias en el pene suelen ser afectados en primer lugar, porque son muy pequeñas y estrechas. Por lo tanto, tiene todo el sentido que éstas pueden dañarse primero. El ejercicio que baja la testosterona haga click aqui http://aumentar-testosterona.good-info.co/

Verrugas Genitales, Verrugas Del Papiloma Humano, Verrugas En El Cuerpo, Como Eliminar Lunares -- http://sinverrugasylunares.plus101.com --- El Nitrógeno Liquido Es Seguro Para Eliminas Tus Verrugas? Dentro de los tratamientos para las verrugas que la medicina convencional ofrece existe la crioterapia el cual se utiliza nitrógeno líquido. Este tratamiento es de los más comunes que se utilizan para remover las verrugas, este tratamiento debe ser administrado por un profesional especializado. Ya que si se hace sin la supervisión adecuada puede provocar severos daños en la piel. El tratamiento se aplica de la forma siguiente: Se aplica sobre la verruga un poco de nitrógeno líquido ya sea en aerosol o con un algodón, teniendo cuidado de no aplicar a áreas sanas de la piel, esto debido a que el nitrógeno líquido puede afectar severamente a la piel sana, es por eso que debe ser aplicado por un profesional. Para eliminar la verruga serán necesarias varias aplicaciones, al cabo de 2 a 3 semanas la verruga se caerá dejando una costra sobre la piel. Las molestias sobre este tratamiento depende mucho del especialista que lo aplique, existen casos en que a sido doloroso porque el médico a rociado nitrógeno líquido en las partes alrededor de la verruga, lo cual produce un severo daño a la piel, eso sin contar la costra que se forma en la parte donde estuvo la verruga después de que esta se cayera. Generalmente el dolor es mínimo pero también se tiene la opción de aplicar anestesia local sobre la parte afectada. Tu sistema inmunológico es un arma poderosa contra todas las infecciones que existen, pero lamentablemente no le damos el debido mantenimiento q ue necesita para poder luchar contra las infecciones virales. Te invito a conocer esta guía aquí: http://sinverrugasylunares.plus101.com
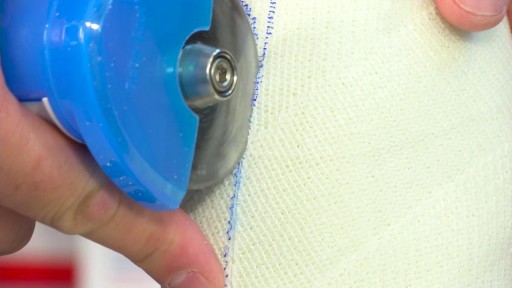
How to Prepare, Apply & Remove a Total Contact Cast
Like a fine whiskey barrel and wine cellar, cannabis also comes at its best when aged in a dark, cool place. Though there is no steadfast expiration date for cannabis, the method you use for preserving the cannabis makes a big difference in maintaining the buds’ freshness and potency. The question is, how do you store cannabis in a way that could extend its longevity while maintaining the vigor and freshness? Experts have described different methods. However, here are some time-proven methods that are easy and inexpensive and require very less equipment. Use air-tight glass containers to store the weed Use clean air-tight glass containers or jars to store cannabis. You can buy glass containers from any ordinary supermarket or hardware store. The tricky part is to make sure you do leave some air in the container while the air stored with cannabis isn’t in detrimental extent. Always leave 1/4 space at the top of the canister or container. Do not fill the containers to the brim with the buds. If you leave no air, then the buds will dry out. If you have too much air, the buds will get damp and moldy. Freeze your cannabis in a convenient temperature The best way to store your buds is in air-tight glass jars, in a cool and dark place under an ideal temperature between 60 and 70 degrees Fahrenheit. If you need to store a high volume of cannabis, you can freeze them after keeping them completely dry for a period of 4 weeks. On this note, you should know that you must not handle frozen buds until it becomes normal in room temperature as trichomes become brittle and can easily break off in freezing temperature. Refrigerate your cannabis (Not Recommended) Even if you use airtight jars, cannabis can grow mold in the fridge. So, you should avoid storing cannabis in the fridge. If you can’t help but doing it, make sure the weed is completely dry and put them in the back where the humidity and temperature don’t fluctuate. Plastic Baggies (Worst method!) Albeit this is very common among people who aren’t expert in handling cannabis, this is the worst of all storage methods. Cannabis gets brittle and dries out in plastic bags. It also loses its natural smell, and the potency deteriorates sharply. So, it should be avoided entirely or can be used for a short-term if there is no better alternative. Here are some things you should know while storing cannabis - Make sure cannabis has been cured for at least 4 weeks before putting them into long-term storage. Without proper curing before storage, the buds can lose their strength and smoothness. - Sunlight can stop the medicinal qualities of cannabis. Your cannabis, if stored correctly, can maintain its medicinal qualities for a few years. Exposure to Sun will turn your cannabis brown, no matter how you have stored it away. - Air-tight, nonporous glass jar are the best way for storing the buds for long term. You can use metal or plastic box/bag, but that could reduce the smell and taste after a while. - Avoid heat and middling temperature in the place where you store your buds. The ideal temperature is 60-70°F (15-21°C) or under 32°F (0°C). Extra heat, cold or middling temperature cause the cannabis potency to decrease. - Keep your cannabis away from any electronic devices or appliances that will expose the cannabis to heat. Keeping cannabis on top of a microwave, or near a laptop or mobile charge is a bad idea. Now, as you know that how to store cannabis properly and make it last for years, enjoy the best form of your weeds even it comes from the previous year. Do write to us in the comments section if you have any questions. Also, don’t forget to hit the subscribe button below. Visit OnlineMedicalCard.com now to get an MMJ recommendation online in less than 10 minutes.
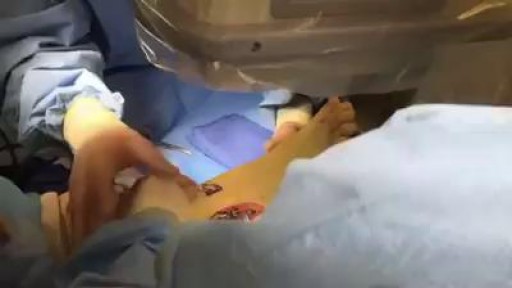
Ankle Fracture Surgery Video

Discover how hemodialysis works and the different options available for this dialysis treatment.
Related articles on DaVita.com:
What Is Hemodialysis? (http://www.davita.com/treatmen....t-options/hemodialys
How Does a Dialysis Machine Work? (http://www.davita.com/treatmen....t-options/hemodialys

Joe Ingles suffered a very bad looking injury on Sunday night in the NBA. In this video we'll review what happened and discuss the possibilities.
NBA and Basketball Videos:
https://youtube.com/playlist?l....ist=PLrdpldKEF234R2w
MY MUSIC:
Epidemic Sound - Sign up with this link for a FREE 30 day trial!
https://www.epidemicsound.com/referral/2m1bb5/
Follow Me on Twitter!
https://twitter.com/briansuttererMD
I'm a doctor and a sports fan and this channel is dedicated to exploring the unique medical side of the world of sports, including NBA, MLB, NFL, UFC, and many more! Breaking down the biggest what ifs, historical injuries and stories, and making learning about medicine fun and relevant for all sports fans!
Anatomy images: https://www.biodigital.com
DISCLAIMER: Content not intended to be taken as medical advice. Opinions are my own and do not represent those of my employer. I have not personally treated or evaluated the individual(s) discussed in this video. Content used with educational and transformative intent within Fair Use Guidelines
Content owned and produced by Brian Sutterer LLC 2022
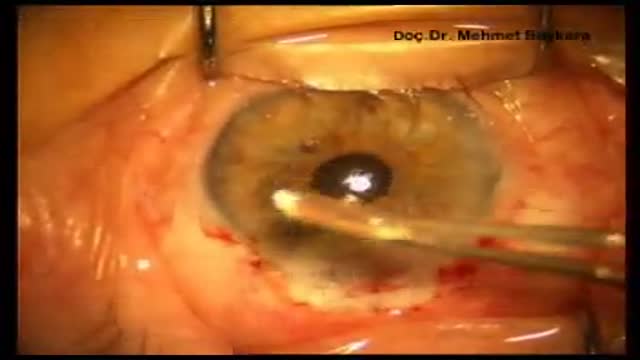
Posterior Iris Claw Lens Implantataion
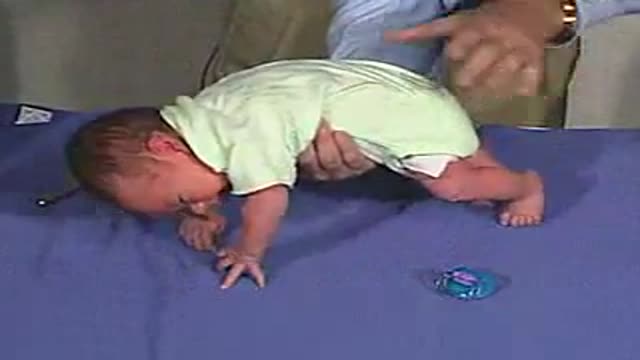
Galant Reflex
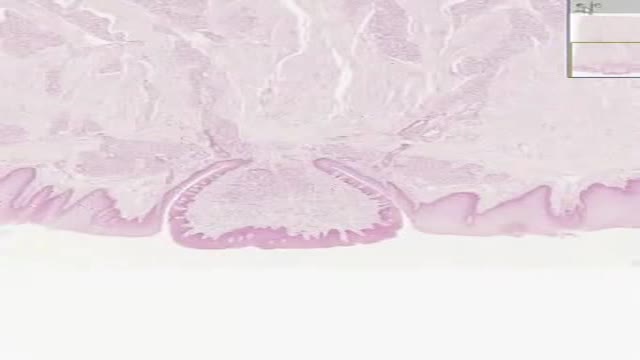
Histology of Tongue Circumvallate Papilla

Histology of Gastric Fundus

Histology of Submandibular Gland

Histology of Parathyroid

1500 mg of sodium amounts to 0.75 teaspoons or 3.75 grams of salt per day, while 2300 mg amounts to one teaspoon or 6 grams of salt per day. Most people today are eating much more than that. The average intake of sodium is about 3400 mg, most of it coming from processed foods.

The DASH diet is a lifelong approach to healthy eating that's designed to help treat or prevent high blood pressure (hypertension). The DASH diet encourages you to reduce the sodium in your diet and eat a variety of foods rich in nutrients that help lower blood pressure, such as potassium, calcium and magnesium.
