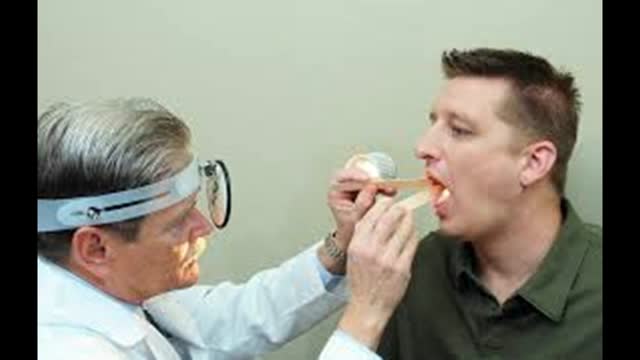
- Physical Examination
- Surgical Examination
- Ophthalmology
- Clinical Skills
- Orthopedics
- Surgery Videos
- Laparoscopy
- Pediatrics
- Funny Videos
- Cardiothoracic Surgery
- Nursing Videos
- Plastic Surgery
- Otorhinolaryngology
- Histology and Histopathology
- Neurosurgery
- Dermatology
- Pediatric Surgery
- Urology
- Dentistry
- Oncology and Cancers
- Anatomy Videos
- Health and Fitness
- Radiology
- Anaesthesia
- Physical Therapy
- Pharmacology
- Interventional Radiology
- Cardiology
- Endocrinology
- Gynecology
- Emergency Medicine
- Psychiatry and Psychology
- Childbirth Videos
- General Medical Videos
- Nephrology
- Physiology
- Diet and Food Health
- Diabetes Mellitus
- Neurology
- Women Health
- Osteoporosis
- Gastroenterology
- Pulmonology
- Hematology
- Rheumatology
- Toxicology
- Nuclear Medicine
- Infectious Diseases
- Vascular Disease
- Reproductive Health
- Burns and Wound Healing
- Other
Top videos

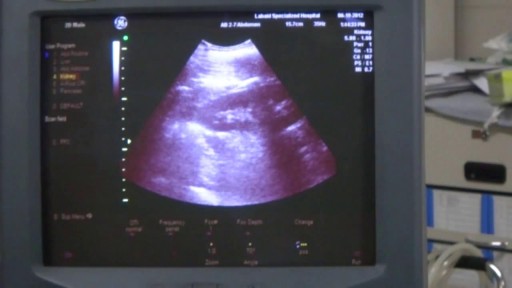
A biopsy is a diagnostic test that involves collecting small pieces of tissue, usually through a needle, for examination with a microscope. A kidney biopsy can help in forming a diagnosis and in choosing the best course of treatment.
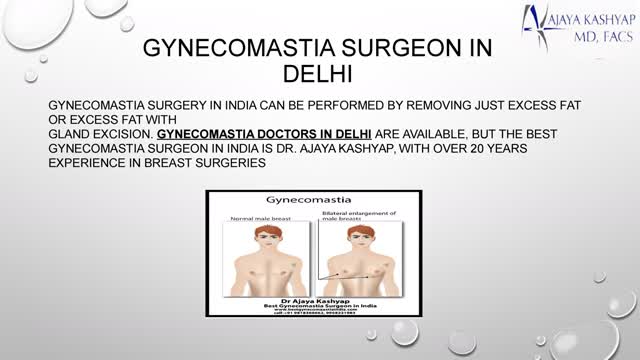
Best Gynecomastia surgeon in India is Dr. Ajaya Kashyap, with over 20 years experience in breast surgeries. He is the only active Indian member in American Society of Plastic Surgeons. Contact us to find out about your gynecomastia treatment in Delhi, India, maintaining high international standards, having a U.S. board certified surgeon, and latest technology and surgical techniques, our offices offer very economical costing. Contact us today inquire about gynecomastia surgery cost, in Delhi. You are sent query using WhatsApp and website.
For further information, are available visit our website: http://www.bestgynecomastiaindia.com/
Your Query for Chat and call +91-9818369662, 9958221983 (WhatsApp)

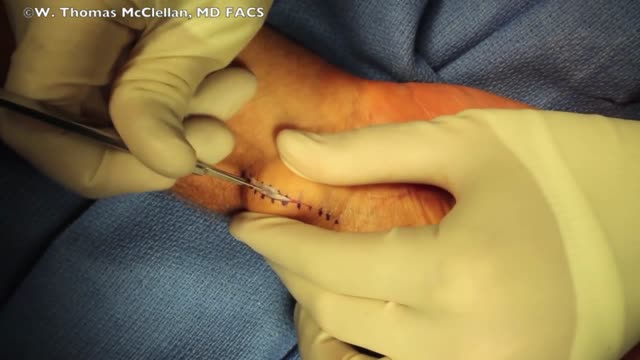
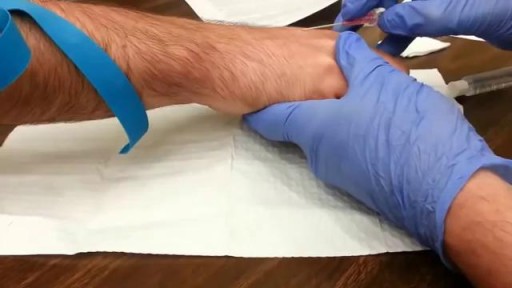
Ganglion Cyst Volar Wrist Removal Ganglion cysts are noncancerous lumps that most commonly develop along the tendons or joints of your wrists or hands. They also may occur in the ankles and feet. Ganglion cysts are typically round or oval and are filled with a jellylike fluid. Small ganglion cysts can be pea-sized, while larger ones can be around an inch (2.5 centimeters) in diameter. Ganglion cysts can be painful if they press on a nearby nerve. Their location can sometimes interfere with joint movement. If your ganglion cyst is causing you problems, your doctor may suggest trying to drain the cyst with a needle. Removing the cyst surgically also is an option. But if you have no symptoms, no treatment is necessary. In many cases, the cysts go away on their own.

Heavy period blood can be especially alarming if it contains clots. In most cases, though, red, brown, or even black menstrual blood clots are normal—just bits of the endometrium (the lining of the uterus) that are shed during menstruation.
Nose Cyst Extraction
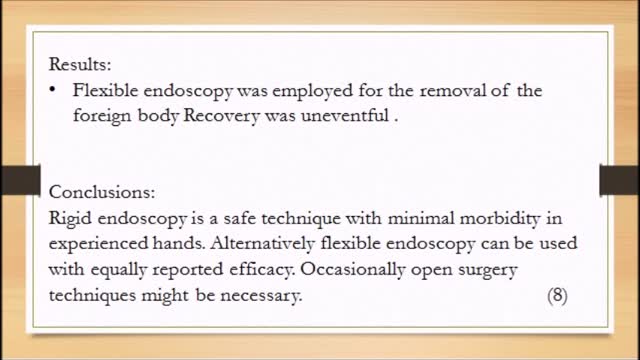
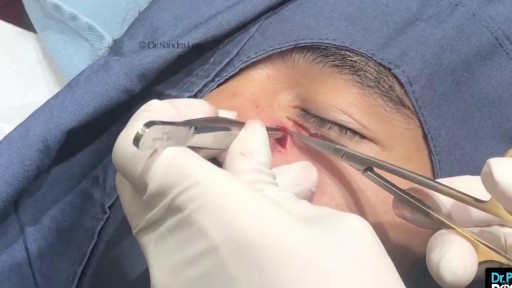
We present a cases of child of age 4 yrs with open safety pin (SP) impacted in the U/3 esophagus and description of the techniques used for their removal

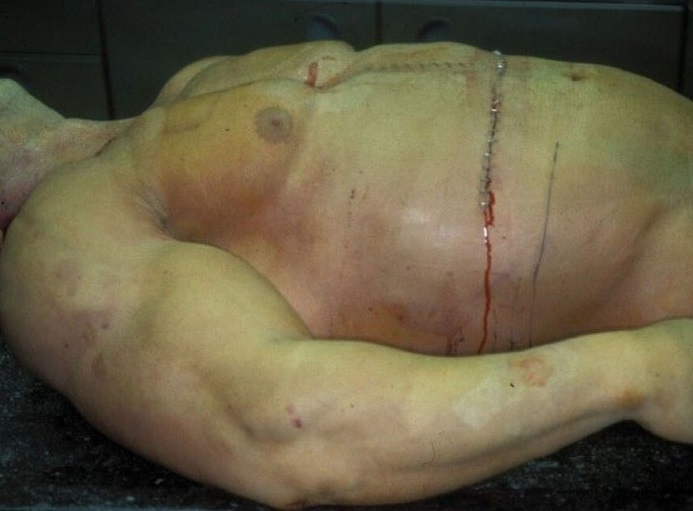
Draining HUGE back abscess

Causes of Polycystic Ovarian Syndrome|| Common gynaecological problems in women Polycystic ovarian syndrome, or PCOS, is a condition where a woman's ovaries and adrenal glands produce more androgens than normal, resulting in increased body hair, acne and irregular periods. While researchers are not certain of the exact cause of PCOS, it is known that an imbalance of the endocrine system is responsible for many of the changes associated with it. However, it is still not known exactly what causes those changes.
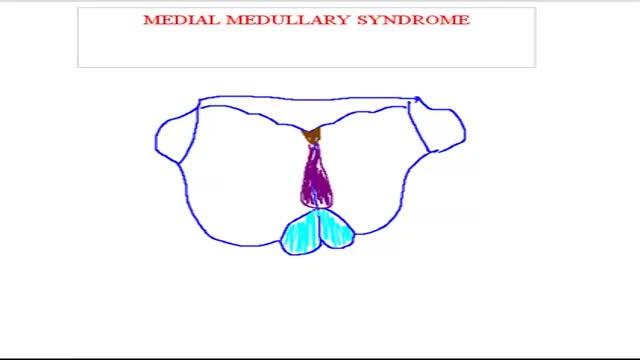
Medial medullary syndrome, also known as Dejerine syndrome, represents less than 1% of brainstem stroke syndromes. Thrombotic or embolic occlusion of small perforating branches from vertebral or proximal basilar artery supplying the medial aspect of medulla oblongata cause this rare syndrome. It is characterized by contralateral hemiplegia/hemiparesis as well as hemisensory loss with ipsilateral hypoglossal palsy (ipsilateral tongue weakness and atrophy) from involvement of CN XII nucleus. Other manifestations e.g. vertigo, nausea, ipsilateral limb ataxia are also reported.
Retropharyngeal abscess (RPA) produces the symptoms of sore throat, fever, neck stiffness, and stridor. RPA occurs less commonly today than in the past because of the widespread use of antibiotics for suppurative upper respiratory infections. The incidence of RPA in the United States is rising, however. Once almost exclusively a disease of children, RPA is observed with increasing frequency in adults. It poses a diagnostic challenge for the emergency physician because of its infrequent occurrence and variable presentation.
Watch that video to know Steroids Side Effects on The Human Body

Watch that video to know the Premature Ejaculation Causes and Cures
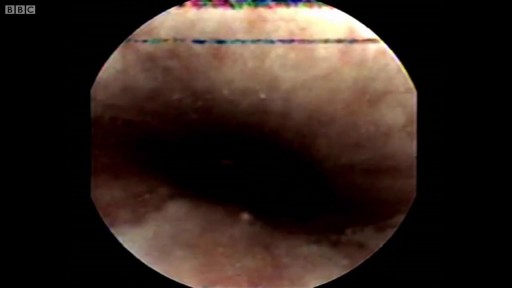
There’s a strange, mysterious world inside us, an alien-looking environment that turns the food we eat into nutrients that keep us alive. Michael Mosley swallows a camera to take a closer look.

The experts at stalbertphysiotherapy.com have now served over 12,420 patients in the St. Albert and Edmonton communities. Since 1992, they have helped patients find relief from pain from physical ailments caused from such things as disease, injuries, and deformities. The team of rehabilitation therapists are now offering no obligation appointments so potential patients can find out more about how the service might help them. Visit - https://stalbertphysiotherapy.com/contact/


Watch that video to know How to Increase Your Chances Getting Pregnant with Twins
