- Physical Examination
- Surgical Examination
- Ophthalmology
- Clinical Skills
- Orthopedics
- Surgery Videos
- Laparoscopy
- Pediatrics
- Funny Videos
- Cardiothoracic Surgery
- Nursing Videos
- Plastic Surgery
- Otorhinolaryngology
- Histology and Histopathology
- Neurosurgery
- Dermatology
- Pediatric Surgery
- Urology
- Dentistry
- Oncology and Cancers
- Anatomy Videos
- Health and Fitness
- Radiology
- Anaesthesia
- Physical Therapy
- Pharmacology
- Interventional Radiology
- Cardiology
- Endocrinology
- Gynecology
- Emergency Medicine
- Psychiatry and Psychology
- Childbirth Videos
- General Medical Videos
- Nephrology
- Physiology
- Diet and Food Health
- Diabetes Mellitus
- Neurology
- Women Health
- Osteoporosis
- Gastroenterology
- Pulmonology
- Hematology
- Rheumatology
- Toxicology
- Nuclear Medicine
- Infectious Diseases
- Vascular Disease
- Reproductive Health
- Burns and Wound Healing
- Other
Top videos

►Pass your CNA Exam on Your First Try - https://bit.ly/3ulqCz1
This is the Basic Nursing Skills Exam. There are 70 questions that will help you prepare for the 2023 CNA examination. The questions in this practice test are based on the category, Basic Nursing Skills, that is included in the exam. They are similar to the actual questions that you will be asked. Some of the topics covered in this practice test include:
Care for residents with a specific diagnosis, such as Congestive Heart Failure
Interpreting medical abbreviations and acronyms
CNA responsibilities: vital signs and intake & output
Medical abbreviations and terms
Common patient scenarios

The night before the exam...
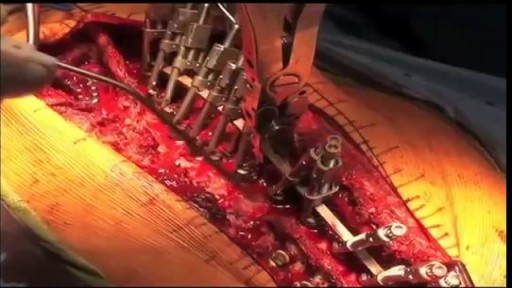
Tough to beat! Head #InsideTheOR with S. Christopher Malaisrie, MD, and witness open heart surgery by one of the best cardiology and heart surgery programs in the nation as ranked by US News and World Report.

This Basic Laparoscopic Surgery: Abdominal Access and Trocar Introduction course will teach you the steps of Laparoscopic Surgery. View the full course for free by signing up on our website: https://www.incision.care/
What is Laparoscopic Surgery:
Laparoscopic surgery describes procedures performed using one or multiple small incisions in the abdominal wall in contrast to the larger, normally singular incision of laparotomy. The technique is based around principles of minimally invasive surgery (or minimal access surgery): a large group of modern surgical procedures carried out by entering the body with the smallest possible damage to tissues. In abdominopelvic surgery, minimally invasive surgery is generally treated as synonymous with laparoscopic surgery as are procedures not technically within the peritoneal cavity, such as totally extraperitoneal hernia repair, or extending beyond the abdomen, such as thoraco-laparoscopic esophagectomy. The term laparoscopy is sometimes used interchangeably, although this is often reserved to describe a visual examination of the peritoneal cavity or the purely scopic component of a laparoscopic procedure. The colloquial keyhole surgery is common in non-medical usage.
Surgical Objective of Laparoscopic Surgery:
The objective of a laparoscopic approach is to minimize surgical trauma when operating on abdominal or pelvic structures. When correctly indicated and performed, this can result in smaller scars, reduced postoperative morbidity, shorter inpatient durations, and a faster return to normal activity. For a number of abdominopelvic procedures, a laparoscopic approach is now generally considered to be the gold-standard treatment option.
Definitions
Developments of Laparoscopic Surgery:
Following a number of smaller-scale applications of minimally invasive techniques to abdominopelvic surgery, laparoscopic surgery became a major part of general surgical practice with the introduction of laparoscopic cholecystectomy in the 1980s and the subsequent pioneering of endoscopic camera technology. This led to the widespread adoption of the technique by the early- to mid-1990s. The portfolio of procedures that can be performed laparoscopically has rapidly expanded with improvements in instruments, imaging, techniques and training — forming a central component of modern surgical practice and cross-specialty curricula [2]. Techniques such as laparoscopically assisted surgery and hand-assisted laparoscopic surgery have allowed the application of laparoscopic techniques to a greater variety of pathology. Single-incision laparoscopic surgery, natural orifice transluminal endoscopic surgery, and minilaparoscopy-assisted natural orifice surgery continue to push forward the applications of minimally invasive abdominopelvic techniques; however, the widespread practice and specific indications for these remain to be fully established. More recently, robotic surgery has been able to build on laparoscopic principles through developments in visualization, ergonomics, and instrumentation.
This Basic Laparoscopic Surgery: Abdominal Access and Trocar Introduction course will teach you:
- How to access the abdomen using an open, closed, and direct optical-entry technique
- Principles underlying safe abdominal insufflation
- The vascular anatomy of the abdominal wall and its implications for trocar placement
- How to introduce trocars into the peritoneal cavity
- The principle of triangulation and how this can be applied to organizing a laparoscopic surgical field
Specific attention is given to these hazards you may encounter:
- Intravascular, intraluminal, or extraperitoneal needle position
- Limitations of a closed introduction technique
- Abdominal surgical history
- Limitations of an open introduction technique
- Optical trocar entry in thin individuals
- Visualization of non-midline structures
- Limitations of direct optical-entry techniques
- Limitations of clinical examination to confirm intraperitoneal insufflation
- Leakage of insufflation gas
These tips are designed to help you improve your understanding and performance:
- Alternative left upper quadrant approach
- Testing Veress needle before use
- Lifting the abdominal wall for Veress needle introduction
- "Hanging-drop test"
- Palmer's test
- Confirming intra-abdominal insufflation
- Subcutaneous tissue retraction
- Anatomy of the umbilicus
- Retraction of abdominal wall fascia
- Finger sweep of anterior abdominal wall
- Lifting the abdominal wall for optical trocar introduction
- Identification of venous bleeding at the end of a procedure
- Identification of inferior epigastric vessels by direct vision
- Peritoneal folds of the anterior abdominal wall
- Transillumination of superficial epigastric vessels
- Infiltration of local anesthetic at port sites
- Aiming of trocars
- Selection of trocar size
- Maintaining direct vision


ABGs Made Easy | Arterial Blood Gas | Acid Base Balance: Everything You Need To Know!

A successful cardiovascular exam includes visual examination, palpation of the apical impulse, auscultation of Erb's point, auscultation of the carotids, and auscultation over the four different heart valve locations (aortic, pulmonic, tricuspid, and mitral). Additionally, the radial pulse is palpated while auscultating to distinguish whether a murmur is diastolic or systolic.
Video Index:
0:13 - Inspection of the thorax
0:29 - Palpation of the apex heart beat
0:59 - Auscultation of the heart
1:16 - Auscultation of the Erb’s point
1:33 - Using Erb’s point to check the heart rate
1:45 - Systolic and diastolic heart sound identification
2:01 - Ascultating individual valves: aortic, pulmonary, tricuspid, mitral
2:41 - Ascultation of the carotids
2:54 - Ascultating the pulmonary and aortic valves
3:04 - Ascultation of the mitral valve
3:16 - Mitral valve murmurs
Subscribe to AMBOSS YouTube for the latest clinical examination videos, medical student interviews, study tips and tricks, and live webinars!
Free 5 Day Trial: https://go.amboss.com/amboss-YT
Instagram: https://www.instagram.com/amboss_med/
Facebook: https://www.facebook.com/AMBOSS.Med/
Twitter: https://twitter.com/ambossmed
Blog: https://blog.amboss.com/us
#CardiovascularExamination #AuscultationOfTheHeart #USMLE #AMBOSSMed

Nasal polyps are linked to allergic rhinitis, asthma, aspirin allergy, sinus infections, acute and chronic infections, something stuck in the nose, and cystic fibrosis. But many times the cause is unknown. Sometimes, people get them before they develop asthma or sinusitis
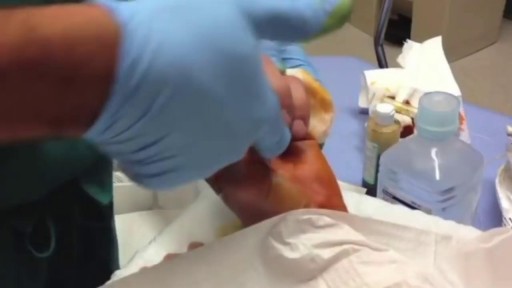
Lipomas are slow-growing soft tissue tumours that rarely reach a size larger than 2 cm. Lesions larger than 5 cm, so-called giant lipomas, can occur anywhere in the body but are seldom found in the upper extremities. The authors present their experiences with eight patients having giant lipomas of the upper extremity. In addition, a review of the literature, and a discussion of the appropriate evaluation and management are included.
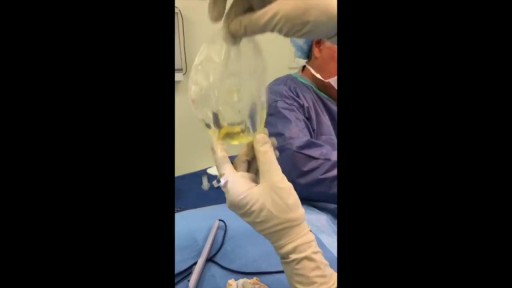
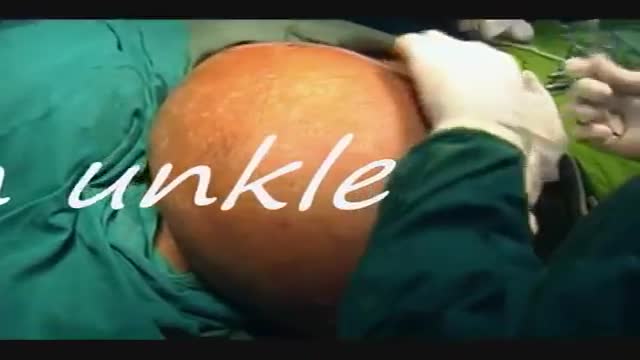
As you can see I access the left implant from the periareolar incisions which I made at the lower portion of the areola. As I entered the capsule and begin to remove the implant I noticed a lot of fluid surrounding the implant. Right away I know this is a rupture and that the mammogram was incorrect. Mammograms are very helpful in detecting cancer but often not ruptures. When implants rupture, it is important to have them replaced as soon as possible to avoid excessive scarring in the breasts. If too much scar tissue has accumulated around the deflated implant, it becomes difficult to create a normal breast shape in the future. Therefor know the signs of a ruptured implant such as, painful to touch, visible asymmetry or loss of integrity to the bag. For more information please visit: www.drlinder.com
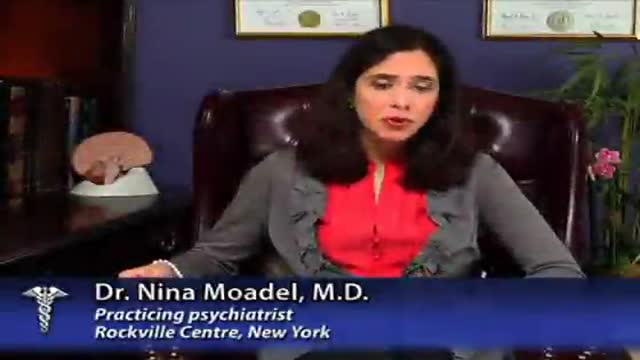
Bipolar Disorder Types Overview
Foreign Body(FB) Airway (Whistle) was inhailed by a child causing intermitent stridor & respiratory distress.FForeign Body was removed successfully by rigid endoscopy under General Anesthesia (G/A).The relevant steps of procedure are shown
management of the second stage of labour
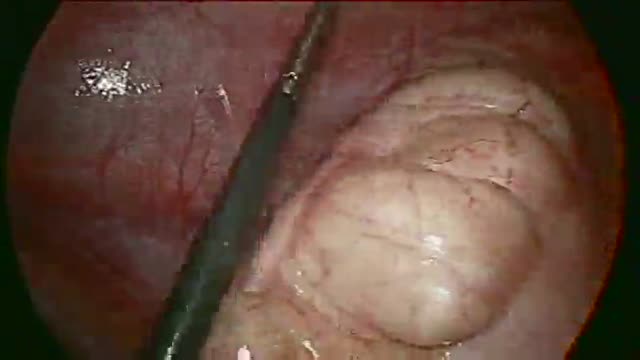
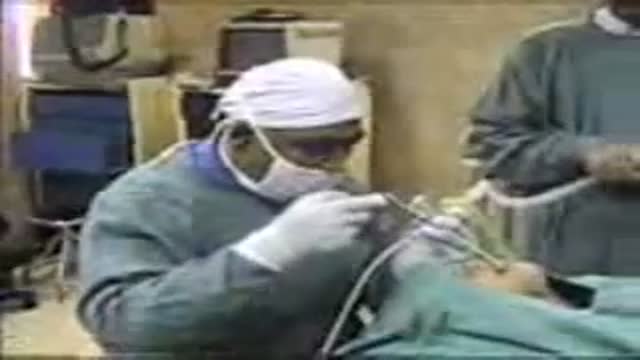
High definition video showing laparoscopic appendectomy operation


Clinical case discussion for exams.
Useful for medical students and others.
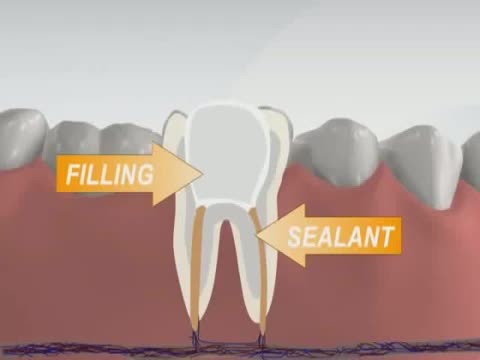
Has your dentist or endodontist told you that you need root canal treatment? If so, you're not alone. Millions of teeth are treated and saved each year with root canal, or endodontic, treatment. Remember, root canal treatment doesn't cause pain, it relieves it. Watch our videos below to learn more! Inside the tooth, under the white enamel and a hard layer called the dentin, is a soft tissue called the pulp. The pulp contains blood vessels, nerves and connective tissue, and helps to grow the root of your tooth during development. In a fully developed tooth, the tooth can survive without the pulp because the tooth continues to be nourished by the tissues surrounding it.
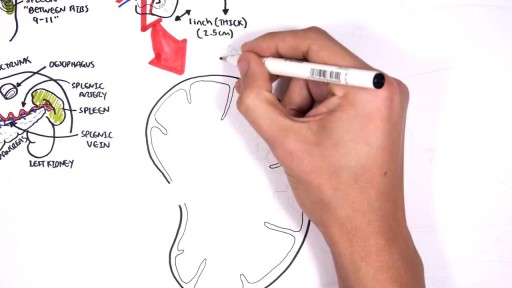
The spleen is an organ in the upper far left part of the abdomen, to the left of the stomach. The spleen varies in size and shape between people, but it’s commonly fist-shaped, purple, and about 4 inches long. Because the spleen is protected by the rib cage, you can’t easily feel it unless it’s abnormally enlarged. The spleen plays multiple supporting roles in the body. It acts as a filter for blood as part of the immune system. Old red blood cells are recycled in the spleen, and platelets and white blood cells are stored there. The spleen also helps fight certain kinds of bacteria that cause pneumonia and meningitis.
In as many as 80% of cases, doctors don’t find the exact reason for a curved spine. Scoliosis without a known cause is what doctors call “idiopathic.” Some kinds of scoliosis do have clear causes. Doctors divide those curves into two types -- structural and nonstructural. In nonstructural scoliosis, the spine works normally, but looks curved. Why does this happen? There are a number of reasons, such as one leg’s being longer than the other, muscle spasms, and inflammations like appendicitis. When these problems are treated, this type of scoliosis often goes away.
